4
This appliance must be
grounded. In the event of an
electrical short circuit, ground-
ing reduces the risk of electric
shock by providing an escape
wire for the electric current.
This appliance is equipped with
a power cord having a ground-
ing wire with a grounding plug.
The plug must be plugged into
an outlet that is properly
installed and grounded.
Consult a qualified electrician
or service technician if the
grounding instructions are not
completely understood, or if
doubt exists as to whether the
appliance is properly ground-
ed.
If the outlet is a standard 2-
prong wall outlet, it is your per-
sonal responsibility and obliga-
tion to have it replaced with a
properly grounded 3-prong wall
outlet.
For best operation, plug this
appliance into its own electrical
outlet to prevent flickering of
lights, blowing of fuse or trip-
ping of circuit breaker.
Do not under any circum-
stances cut or remove the third
(ground) prong from the power
cord.
Do not use an adapter plug
with this appliance.
Do not use an extension cord
with this appliance. If the power
cord is too short, have a quali-
fied electrician or service tech-
nician install an outlet near the
appliance.
GROUNDING
INSTRUCTIONS
IMPORTANT SAFETY INFORMATION
WARNING!
Improper use of the ground-
ing plug can result in a risk of
electrical shock.
WARNING!
Extreme Weight Hazard
Use two or more people when
moving the wine cooler.
Beneath the wine cooler there
are two leveling legs that are
located on either side of the
vent. It is important that your
wine cooler is level. To level the
wine cooler:
1. Move the wine cooler to
its final location.
2. Have someone gently lean
on the front of the wine
cooler to take some of the
weight off of the leveling
legs.
3. Turn the leveling legs clock-
wise to raise the wine
cooler, or counter-clockwise
to lower it. Continue in this
manner until the wine
cooler is level. See Fig. A.
Leveling
Instructions
Fig. A
Raises
Lowers
33
Instrucciones
para las repisas
¡IMPORTANTE!
No recubra los estantes
con papel de aluminio ni
ningún otro material que
evite la adecuada circu-
lación de aire dentro del
gabinete.
Instrucciones de Operación
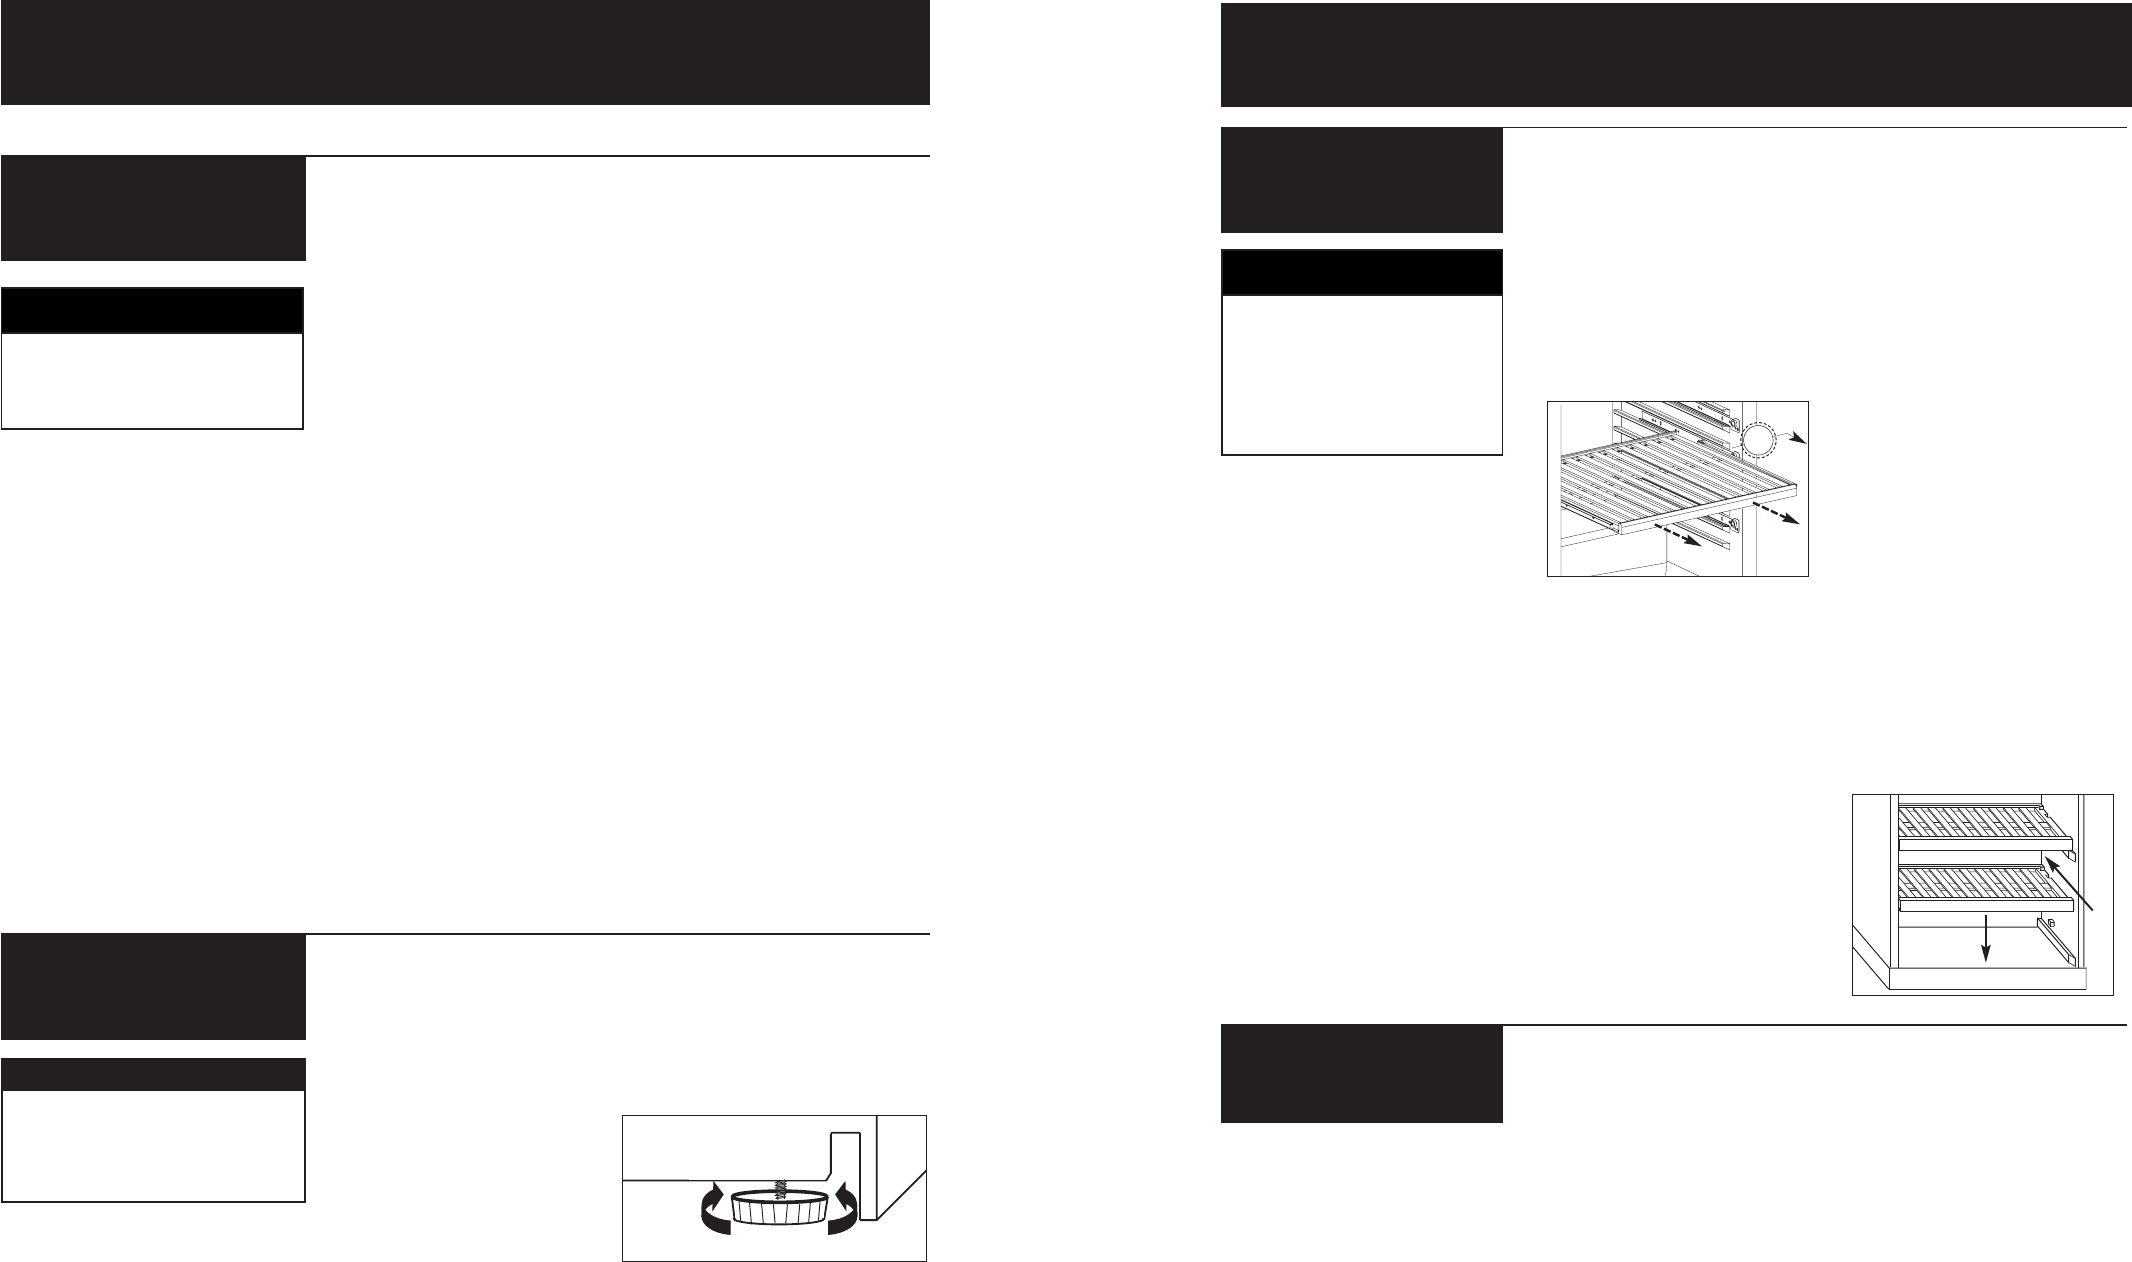
Para sacar una repisa
deslizante (Fig. G):
1. Deslice la repisa
cuidadosamente hacia
fuera hasta encontrar
resistencia.
2. Incline la repisa levemente
hacia arriba (aprox. 15°) y
deslícela cuidadosamente
hacia fuera del gabinete.
Para reinstalar una repisa
deslizante:
1. Coloque las ruedas de la
repisa sobre los rieles.
2. Incline el frente de la repisa
levemente hacia arriba
(aprox. 15°) y deslícela
cuidadosamente dentro del
gabinete hasta que las
ruedas se desplacen
libremente en los rieles.
Para sacar las dos repisas
inferiores:
1. Agárrela con la mano de la
parte de madera.
2. Aplíquele una leve presión
hacia arriba a la parte
posterior de la repisa y una
presión hacia abajo en el
frente.
3. Comience a jalar la repisa
lentamente hacia afuera
hasta que desenganche de
los topes y sáquela del
gabinete.
Para reinstalar las dos repisas
inferiores (Fig. H):
1. Deslice la repisa debajo de
los rieles que están
directamente encima de
aquellos sobre los que desea
apoyar la repisa.
2. Cuando la parte posterior de
la repisa llegue a la pared del
fondo del gabinete, bájela
sobre los rieles.
Fig. G
1
2
15°
1
2
Fig. H
Mudanzas y
vacaciones
Vacaciones
Durante vacaciones cortas,
deje los controles en sus
posiciones usuales. Durante
ausencias más largas:
1. Saque todas las
botellas.
2. Desconecte del
tomacorriente en la
pared.
3. Limpie la unidad
minuciosamente.
4. Deje la puerta abierta
para evitar la
condensación y la
formación de moho,
hongos u olores.
Mudanzas
1. Saque o sujete todo lo
que esté suelto dentro
del enfriador de vinos.
2. Para evitar dañar las
patas niveladoras,
insértelas
completamente en la
base.
 Manymanuals.com
 Manymanuals.de
 Manymanuals.fr
 Manymanuals.it
 Manymanuals.pl
 Manymanuals.cz
 Manymanuals.es
 Manymanuals-pt.com
Comments to this Manuals