CARE AND MAINTENANCE
CLEANING CYCLE
1) Before starting, turn the unit off and turn off the water
supply to unit.
2) When all ice has melted from the evaporator and
fallen into the ice bucket, remove the bucket (being care-
ful not to spill any water) and discard or store ice in a
separate freezer.
Note: If you are using the continuous drain option, the
unit must be turned off during the next step. If you are
using the drain pump option (see separate installation
instructions), please keep the unit turned on (this allows
pump to operate.)
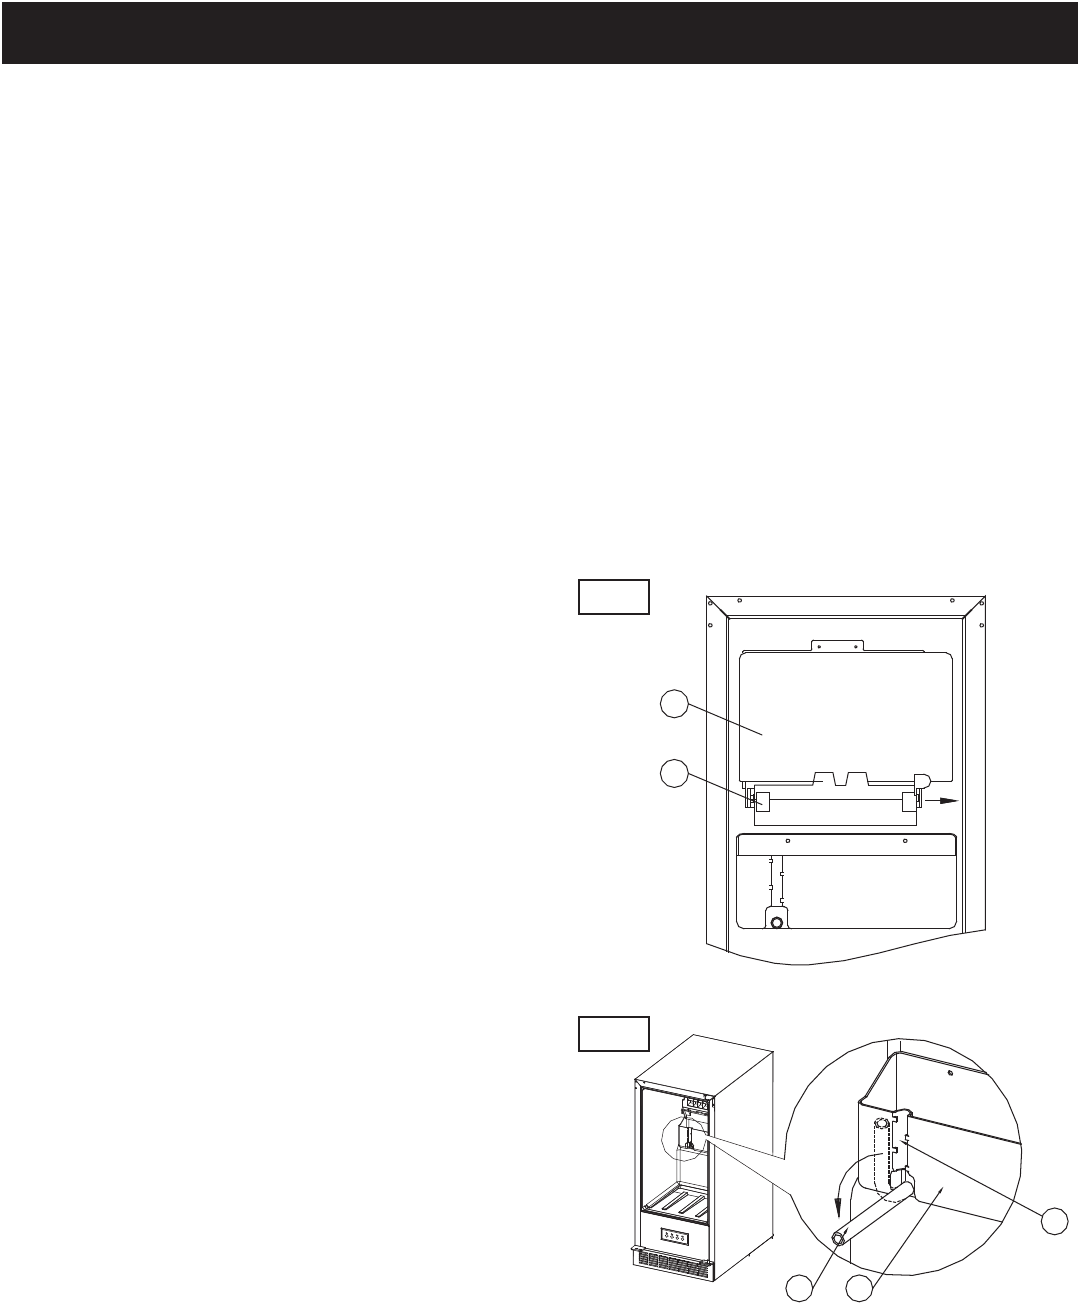
3) Remove the rubber drain hose from the left rear of the
ice maker cavity. Slowly tilt the drain hose down towards
the drain port at the back right – lower corner of the ice
maker cavity. The water will drain into the drain port.
Tilt the drain hose slowly to ensure that the water is not
able to overfl ow the ice bucket area. (see Fig.H)
4) When the water stops coming out of the drain hose,
ensure that all water has been drained from water tank
area. (Look inside to check that all water has been
drained from water container area.) Reinstall the drain
hose by pushing it back into the clips.
5) Fill the water tank with a cleaning solution comprised
of equal parts water and vinegar. Next, turn the water
supply on.
6) Reinstall the ice bucket after the water tank stops
refi lling, and the unit begins to run again.
7) Allow the unit to produce 4 - 6 batches of ice, then
turn the unit off and allow any remaining ice to fall into
the ice bucket.
8) Remove the ice bucket and discard all (6) batches of
ice.
9) If the drain pump mode is being used (see separate
installation instructions), turn the unit on at this point.
Unit has to be in the process (operating mode) in order
for the pump to work. If unit is in standby mode pump will
not operate.
Once again, remove the rubber drain hose
from left side clips and slowly drain the cleaning solution
into the drain port in bottom right side of cabinet area.
10) When all of the solution has drained and unit begins
to cool again, reinstall the ice bucket. Make sure the
reservior is full before unit is turned back on.
11) Discard the fi rst 2 batches of ice that fall into the ice
bucket.
1
2
CLEANING CYCLE
12) Normal ice production can continue when there is no
evidence of the cleaning solution remaining in the
unit.
OUTSIDE CABINET AND DOOR
• Wash the outside cabinet with warm water and mild
liquid detergent. Rinse well and wipe dry with a clean
soft cloth.
• Wring excess water out of the sponge or cloth when
cleaning any electrical parts.
1. Evaporator cover board
2. Direction plate
3. Water container
4. Drain tube
5. Clips
Fig.H
4
Fig.G
43
5


 (42 pages)
 Manymanuals.com
 Manymanuals.de
 Manymanuals.fr
 Manymanuals.it
 Manymanuals.pl
 Manymanuals.cz
 Manymanuals.es
 Manymanuals-pt.com
Comments to this Manuals