Setting the AUTO-ON TIMER (cont’d)
5) All of the settings are now registered. TURN
THE UNIT “OFF” USING THE I/O SWITCH.
6) To set the AUTO-ON timer, the unit must be
turned to the “off” position (non-operational).
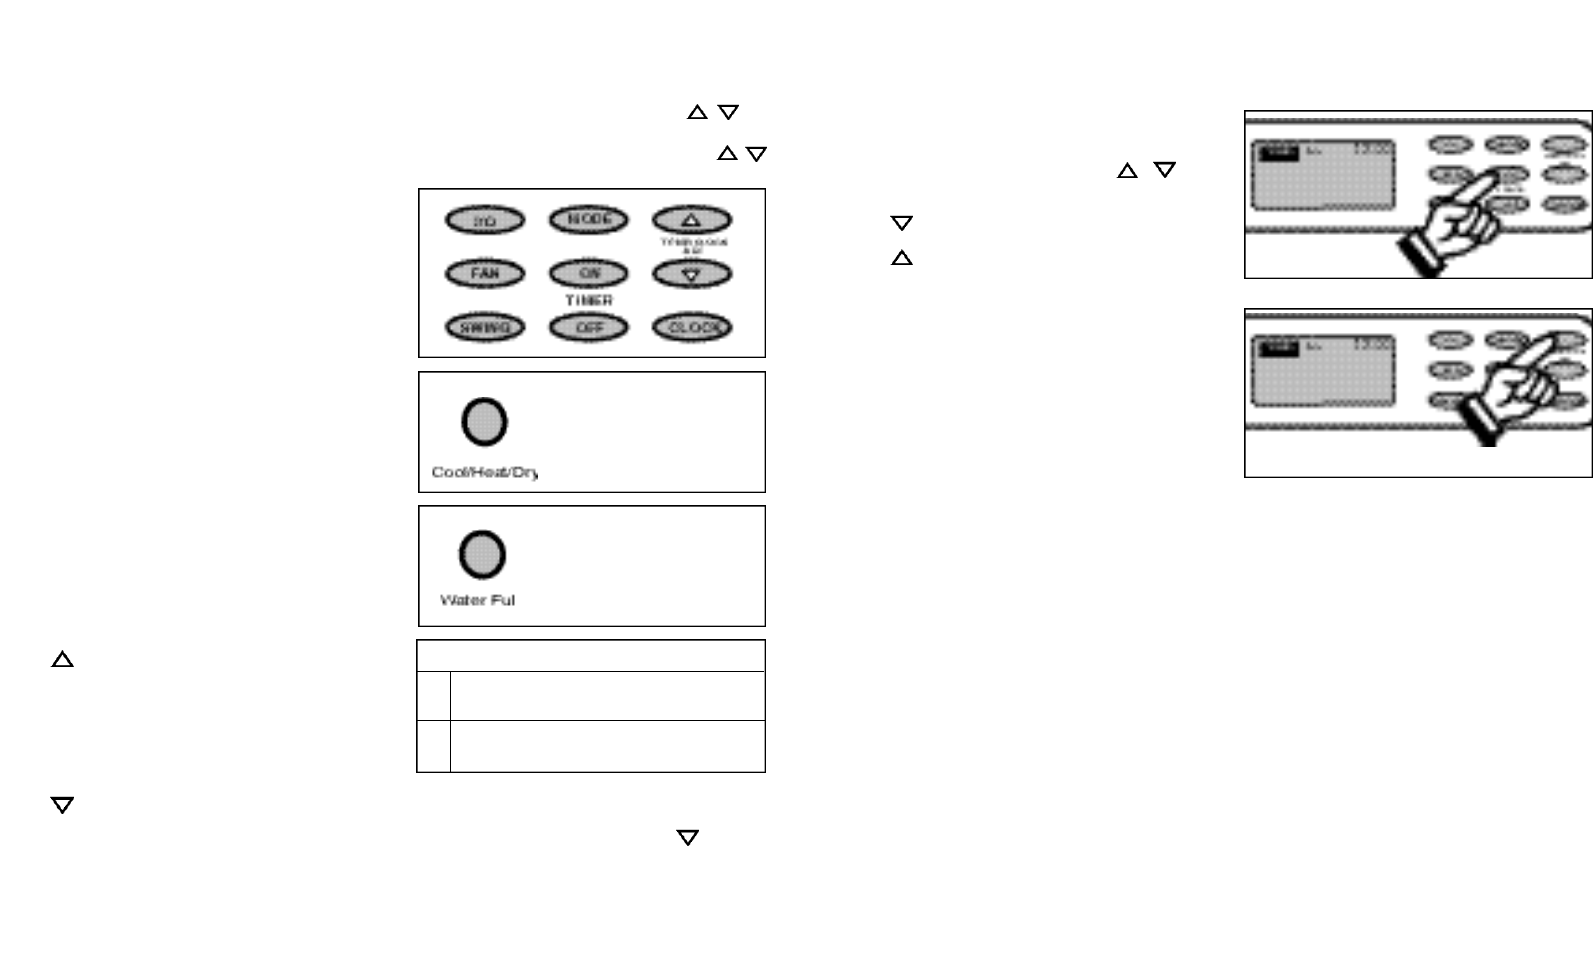
7) Press the TIMER-ON key pad to initiate the
AUTO-ON time sequence. Fig. 32. The display
window will indicate TIMER-ON and the word ON
will flash for 5 seconds. Press the or key
to select the desired AUTO-ON start time.
Fig. 32a.
key pad will decrease the AUTO-TIMED
setting in 10 minute increments.
keypad will increase the AUTO-TIMED
setting in 10 minute increments.
When the desired time is established, (the time
will flash in the display window) press the
CLOCK key pad to register the AUTO TIMER-
ON program. The word ON will stop flashing and
remain “on” (TIMER ON) indicating the program
is set. The time of day clock setting will
immediately revert back in the display window.
IMPORTANT: The desired AUTO-ON time must
be registered within a 5 second period (after
pressing the TIMER-ON key pad) otherwise the
selected time will not register and the system
will automatically revert back to the regular
“time of day” clock setting. If this occurs, you
must repeat step 7 again.
The unit will start automatically when the specified
AUTO-ON time is achieved on the time of day clock
(the “TIMER ON” prompt will disappear from the
display window). To cancel or override the AUTO-
TIMED program, simply turn on the unit before the
AUTO-ON time is scheduled to operate (the “TIMER
ON” prompt will disappear from the display window).
You can varify the AUTO-ON time selection anytime
(prior to the program starting) by pressing the
TIMER-ON key pad. The time you selected will
appear (flash) temporarily (replacing the time of day)
for approximately 5 seconds.
Fig. 32
Fig. 32a
Fig. 5
Fig. 6
Luz verde durante el enfriamiento.
Luz roja durante la calefacción
Luz verde durante la deshumidificación.
Fig. 7
Una señal de advertencia de 8 pitidos
sonará y el indicador de lleno de agua
centelleará cada 0.5 segundos.
Funciones del teclado (Figura 5)
El panel de control sobre esta unidad "ilumina" automáticamente
cuando cualquier almohadilla(bloc) clave es deprimida.
Este rasgo "de iluminación" "auto-desactivará" (la vuelta - de)
automáticamente aprox. 30 segundos después de que la almohadilla(el bloc)
pasada(última) clave es deprimida.
I/O: Conmutador de corriente – encendido/apagado.
Luces indicadoras de MODO: Se iluminan bajo diferentes
graduaciones de modo, Fig. 6.
Modo FRÍO: Luz verde
Modo CALIENTE: Luz roja
Modo SECO (deshumidificador): Luz verde
Modo de VENTILADOR: No hay luz indicadora
Luz verde: Permanece encendida mientras el compresor está
funcionando. La luz verde se apaga cuando se obtiene la temperatura
deseada. Corresponde tanto para el Aire Acondicionado como para el
Deshumidificador.
Luz roja: Permanece encendida mientras la calefacción está
funcionando. La luz roja se apaga cuando se obtiene la temperatura
deseada.
Luz indicadora de lleno de agua: Centellea en rojo cuando el
nivel del agua en el tanque de agua supera el nivel máximo de graduación
o si el tanque de agua no se encuentra en posición correcta en el armario.
Figura 7.
VENTILADOR: Selecciona las velocidades del ventilador Baja-Mediana-Alta.
Opciones de ventilación:
Enfriamiento (3 velocidades) Baja-Mediana-Alta
Calefacción (2 velocidades) Alta-Mediana
Secar – Deshumidificación (1 velocidad) Mediana
Ventilador (3 velocidades) Baja-Mediana-Alta
La graduación de la temperatura/ la hora del día:
: se usa para graduar (hacia adelante) el Reloj de la hora. del día
(incrementos de 1 minuto)
Se usa para graduar (hacia adelante) la temperatura. (incrementos de 1
grado Celsius)
Se usa para graduar (hacia adelante) la temperatura. (incrementos de 2
grados Fahrenheit).
Se usa para graduar (hacia adelante) el reloj automático. (incrementos
de 10 minutos)
: Se usa para graduar (hacia atrás) el Reloj de la hora del día. (incrementos
de 1 minuto)
Se usa para graduar (hacia atrás) la temperatura. (incrementos de 1 grado
Celsius)
Se usa para graduar (hacia atrás) la temperatura. (incrementos de 2
grados Fahrenheit)
Se usa para graduar (hacia atrás) el reloj automático. (incrementos de 10
minutos)
Tabla de conversión de temperaturas
°C 10 11 12 13 14 15 16 17 18 19 20 21
°F 50 52 54 55 57 59 61 63 64 66 68 70
°C 22 23 24 25 26 27 28 29 30 31 32 33
°F 72 73 75 77 79 81 82 84 86 88 90 91
VAIVÉN: Permite que las rejillas verticales tipo persiana oscilen
automáticamente hacia adelante y hacia atrás (vaivén de 70°).
RELOJ: Permite iniciar y/o cambiar la graduación de la HORA
DELDÍA.
RELOJ ACTIVADO: Se usa para iniciar el programa de tiempo de
inicio automático AUTO ON, junto con las teclas y .
RELOJ DESACTIVADO: Se usa para iniciar el programa de tiempo
de parada automática AUTO OFF, junto con las teclas y
.
Nota: Este aparato tiene la opción que se permite de ponerlo en
las temperaturas"Celsius" o "Fahrenheit" Para cambiar la
visualización de la temperatura oprima la tecla " "
(temp/clock) y la tecla "clock" simultáneamente para cambiar
entre la escala Celsius y la escala Fahrenheit.
La escala Celsius permite cambios en incrementos de 1˚C.
La escala Fahrenheit permite cambios en incrementos de 2˚F.
 Manymanuals.com
 Manymanuals.de
 Manymanuals.fr
 Manymanuals.it
 Manymanuals.pl
 Manymanuals.cz
 Manymanuals.es
 Manymanuals-pt.com
Comments to this Manuals